Table of Contents Link to heading
- Connecting to the Router Console
- Initial Configuration Setup
- Configuring Router Interfaces
- Configuring Routing
- Configuring DHCP
- Configuring NAT (Network Address Translation)
- Configuring Security Features
- Configuring Quality of Service (QoS) for Traffic Prioritisation
- Configuring VPN for Secure Remote Access
- Redundancy
- Configuring SNMP for Network Monitoring
- Configuring NetFlow for Traffic Analysis
- Configuring Network Automation with Ansible
- Multicast Routing for Efficient Streaming
- Advanced Security Features
- Cloud Integration for Hybrid Networking
- Configuring IPv6 for Future-Proof Networking
- Configuring VRF (Virtual Routing and Forwarding) for Network Segmentation
- Configuring GRE Tunnel for Secure Site-to-Site Connectivity
- Configuring IPv6 OSPF for Dynamic Routing
- Load Balancing
- Saving Configuration and Final Checks
Configuring a new router for the first time is a crucial step in ensuring a secure, efficient, and scalable network. This guide provides step-by-step instructions, including line-by-line CLI commands.
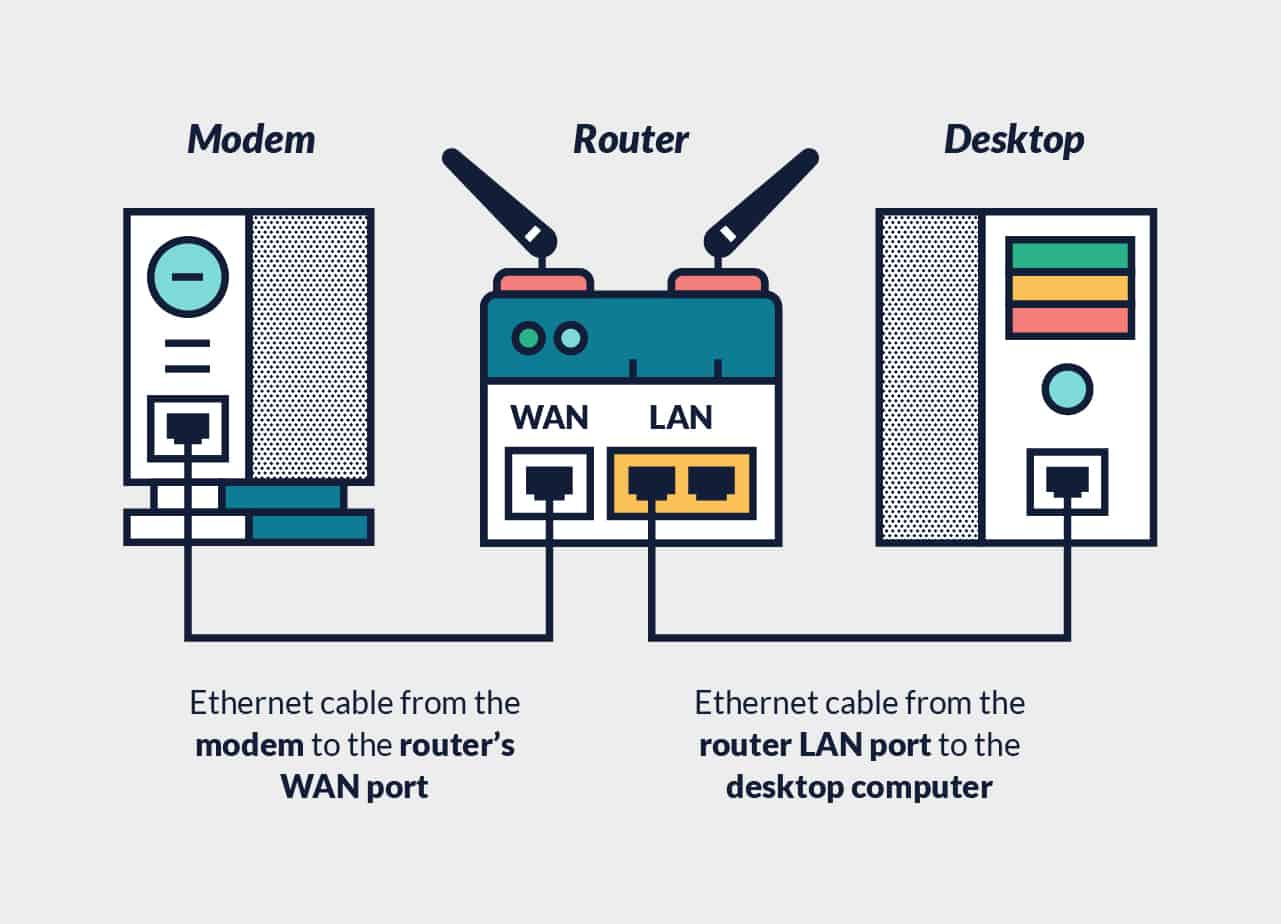
Connecting to the Router Console Link to heading
Physical Connection Link to heading
- Use a console cable (RJ45-to-DB9 or USB-to-Serial) to connect your PC/Laptop to the router’s console port.
- Open a terminal emulator (e.g., PuTTY, Tera Term, SecureCRT) and set the following parameters:
Baud rate: 9600 Data bits: 8 Parity: None Stop bits: 1 Flow control: None - Click Connect or press Enter after opening the terminal.
Access the Router CLI Link to heading
- Press
Enterto enter User EXEC mode (>prompt). - Type
enableto enter Privileged EXEC mode (#prompt appears).
Verify Console Connection Link to heading
show version
show running-config
Ensure the router responds and displays its current configuration.
Initial Configuration Setup Link to heading
Set a Hostname Link to heading
configure terminal
hostname MyRouter
exit
Verify Hostname Link to heading
show running-config | include hostname
Ensure the hostname is correctly set.
Secure Console Access Link to heading
configure terminal
line console 0
password Cisco123
login
exit
Verify Console Security Link to heading
show running-config | section line console
Ensure the password is applied.
Secure VTY Lines (Remote Access via SSH/Telnet) Link to heading
configure terminal
line vty 0 4
password RemotePass
login
exit
Verify VTY Security Link to heading
show running-config | section line vty
Ensure remote access security is configured.
Create a Strong Enable Password Link to heading
configure terminal
enable secret SuperSecurePassword
exit
Verify Enable Password Link to heading
show running-config | include enable secret
Ensure the password is encrypted.
Configuring Router Interfaces Link to heading
Assign IP Addresses to Interfaces Link to heading
configure terminal
interface GigabitEthernet0/0
ip address 192.168.1.1 255.255.255.0
no shutdown
exit
interface GigabitEthernet0/1
ip address 10.0.0.1 255.255.255.0
no shutdown
exit
Verify Interface Configuration Link to heading
show ip interface brief
Ensure interfaces are up and have the correct IP addresses.
Configuring Routing Link to heading
Enable Static Routing Link to heading
configure terminal
ip route 0.0.0.0 0.0.0.0 192.168.1.254
exit
Verify Routing Table Link to heading
show ip route
Ensure the default route is correctly set.
Enable Dynamic Routing (OSPF Example) Link to heading
configure terminal
router ospf 1
network 192.168.1.0 0.0.0.255 area 0
network 10.0.0.0 0.0.0.255 area 0
exit
Verify OSPF Configuration Link to heading
show ip ospf neighbor
show ip ospf interface
Ensure OSPF is active and neighbors are established.
Configuring DHCP Link to heading
Enable DHCP Server Link to heading
configure terminal
ip dhcp excluded-address 192.168.1.1 192.168.1.10
ip dhcp pool LAN
network 192.168.1.0 255.255.255.0
default-router 192.168.1.1
dns-server 8.8.8.8
exit
Verify DHCP Configuration Link to heading
show ip dhcp binding
show ip dhcp pool
Ensure DHCP leases are assigned correctly.
Configuring NAT (Network Address Translation) Link to heading
Enable NAT for Internet Access Link to heading
configure terminal
access-list 1 permit 192.168.1.0 0.0.0.255
ip nat inside source list 1 interface GigabitEthernet0/0 overload
interface GigabitEthernet0/0
ip nat inside
exit
interface GigabitEthernet0/1
ip nat outside
exit
Verify NAT Configuration Link to heading
show ip nat translations
show ip nat statistics
Ensure NAT is translating addresses correctly.
Configuring Security Features Link to heading
Enable Access Control Lists (ACLs) Link to heading
configure terminal
access-list 100 deny tcp any any eq 23
access-list 100 permit ip any any
interface GigabitEthernet0/0
ip access-group 100 in
exit
Verify ACL Configuration Link to heading
show access-lists
show ip interface GigabitEthernet0/0
Ensure ACLs are blocking Telnet traffic.
Enable SSH for Secure Remote Access Link to heading
configure terminal
crypto key generate rsa
ip ssh version 2
username admin secret SecureAdminPassword
line vty 0 4
transport input ssh
login local
exit
Verify SSH Configuration Link to heading
show ip ssh
Ensure SSH is enabled.
Configuring Quality of Service (QoS) for Traffic Prioritisation Link to heading
Enable QoS Globally Link to heading
mls qos
Classify VoIP Traffic Using Access Lists Link to heading
access-list 101 permit udp any any range 16384 32767
Define QoS Classes & Mark VoIP Traffic Link to heading
class-map match-all VOICE
match access-group 101
exit

policy-map QOS-POLICY
class VOICE
priority percent 30
exit
Apply QoS Policy to Interfaces Link to heading
interface GigabitEthernet0/1
service-policy input QOS-POLICY
exit
Verify QoS Configuration Link to heading
show policy-map interface GigabitEthernet0/1
Ensure VoIP traffic is prioritised.
Configuring VPN for Secure Remote Access Link to heading
Enable IPSec VPN Link to heading
crypto isakmp policy 10
encryption aes
hash sha
authentication pre-share
group 2
exit
Define Pre-Shared Key Link to heading
crypto isakmp key MySecureKey address 0.0.0.0
Configure IPSec Transform Set Link to heading
crypto ipsec transform-set VPN-SET esp-aes esp-sha-hmac
Apply VPN to an Interface Link to heading
interface GigabitEthernet0/1
crypto map VPN-MAP
exit
Verify VPN Configuration Link to heading
show crypto isakmp sa
show crypto ipsec sa
Ensure VPN tunnels are established.
Redundancy Link to heading
Ensuring router redundancy is crucial for high availability, fault tolerance, and seamless failover in enterprise networks. Here are advanced redundancy configurations using HSRP, VRRP, and BGP failover.
Configuring Hot Standby Router Protocol (HSRP) for Gateway Redundancy Link to heading
Enable HSRP on VLAN Interfaces Link to heading
interface vlan 10
ip address 192.168.1.1 255.255.255.0
standby 1 ip 192.168.1.254
standby 1 priority 110
standby 1 preempt
exit
Verify HSRP Status Link to heading
show standby
Ensure failover is working and the active router is correctly assigned.
For a detailed guide, check out this Cisco resource.
Configuring Virtual Router Redundancy Protocol (VRRP) for Redundant Gateways Link to heading
Enable VRRP on VLAN Interfaces Link to heading
interface vlan 20
ip address 192.168.2.1 255.255.255.0
vrrp 1 ip 192.168.2.254
vrrp 1 priority 120
exit
Verify VRRP Status Link to heading
show vrrp
Ensure VRRP failover is correctly configured.
For more details, check out this VRRP guide.
Configuring BGP Failover for Redundant Internet Connectivity Link to heading
Enable BGP and Define AS Number Link to heading
configure terminal
router bgp 65001
bgp log-neighbor-changes
exit
Configure BGP Neighbor for Redundant ISP Connections Link to heading
router bgp 65001
neighbor 192.168.1.2 remote-as 65002
neighbor 192.168.2.2 remote-as 65003
exit
Verify BGP Configuration Link to heading
show ip bgp summary
Ensure BGP neighbours are established and failover is working.
For a comprehensive guide, check out this BGP redundancy tutorial.
Configuring SNMP for Network Monitoring Link to heading
Enable SNMP Link to heading
snmp-server community PublicString RO
snmp-server community PrivateString RW
snmp-server location DataCenter
snmp-server contact admin@company.com
Verify SNMP Configuration Link to heading
show snmp community
show snmp location
Ensure SNMP monitoring is active.
Configuring NetFlow for Traffic Analysis Link to heading
Enable NetFlow Link to heading
ip flow-export destination 192.168.1.150 9996
ip flow-export version 9
ip flow-cache timeout active 5
Verify NetFlow Configuration Link to heading
show ip flow export
show ip cache flow
Ensure traffic analytics are working.
Configuring Network Automation with Ansible Link to heading
Enable SSH for Automation Link to heading
ip ssh version 2
username ansible secret SecureAutomation
Verify SSH Access for Automation Link to heading
show ip ssh
Ensure Ansible can manage the router.
Multicast Routing for Efficient Streaming Link to heading
Enable PIM Sparse Mode for Multicast Routing Link to heading
configure terminal
ip multicast-routing
interface GigabitEthernet0/1
ip pim sparse-mode
exit
Set Up a Rendezvous Point (RP) for Multicast Traffic Link to heading
ip pim rp-address 192.168.1.1
Verify Multicast Configuration Link to heading
show ip pim neighbor
show ip igmp groups
Ensure multicast traffic is correctly routed.
For more details, check out this guide.
Advanced Security Features Link to heading
Enable MAC Address Filtering for Higher Security Link to heading
mac address-table static 00e0.abcd.1234 vlan 10 interface GigabitEthernet0/1
mac address-table static 00e0.abcd.5678 vlan 20 interface GigabitEthernet0/2
Enable IP Source Guard to Prevent Spoofing Link to heading
interface GigabitEthernet0/3
ip verify source
exit
Enable Dynamic ARP Inspection (Mitigate ARP Attacks) Link to heading
ip arp inspection vlan 10
ip arp inspection vlan 20
Verify Security Features Link to heading
show mac address-table static
show ip verify source
show ip arp inspection
Ensure security measures are active.
Cloud Integration for Hybrid Networking Link to heading
Integrate External Multicast Services with AWS Link to heading
ip igmp snooping
interface GigabitEthernet0/1
ip pim sparse-mode
exit
Verify AWS Multicast Integration Link to heading
show ip pim neighbor
show ip igmp groups
Ensure multicast traffic flows between on-premises and AWS.
For cloud integration strategies, check out this AWS guide.
Configuring IPv6 for Future-Proof Networking Link to heading
Enable IPv6 Routing Link to heading
configure terminal
ipv6 unicast-routing
exit
Assign IPv6 Addresses to Interfaces Link to heading
interface GigabitEthernet0/0
ipv6 address 2001:db8:1::1/64
no shutdown
exit

interface GigabitEthernet0/1
ipv6 address 2001:db8:2::1/64
no shutdown
exit
Verify IPv6 Configuration Link to heading
show ipv6 interface brief
Ensure IPv6 addresses are correctly assigned.
Configuring VRF (Virtual Routing and Forwarding) for Network Segmentation Link to heading
Create a VRF Instance Link to heading
configure terminal
ip vrf Customer_A
rd 100:1
exit
Assign VRF to an Interface Link to heading
interface GigabitEthernet0/2
ip vrf forwarding Customer_A
ip address 192.168.10.1 255.255.255.0
exit
Verify VRF Configuration Link to heading
show ip vrf
show ip route vrf Customer_A
Ensure VRF is correctly applied.
Configuring GRE Tunnel for Secure Site-to-Site Connectivity Link to heading
Create a GRE Tunnel Interface Link to heading
interface Tunnel0
ip address 10.10.10.1 255.255.255.0
tunnel source GigabitEthernet0/0
tunnel destination 192.168.1.2
exit
Verify GRE Tunnel Link to heading
show interfaces Tunnel0
show ip route
Ensure tunnel is active.
Configuring IPv6 OSPF for Dynamic Routing Link to heading
Enable OSPFv3 Link to heading
configure terminal
ipv6 router ospf 10
router-id 1.1.1.1
exit
Assign OSPFv3 to Interfaces Link to heading
interface GigabitEthernet0/0
ipv6 ospf 10 area 0
exit

interface GigabitEthernet0/1
ipv6 ospf 10 area 0
exit
Verify OSPFv3 Configuration Link to heading
show ipv6 ospf neighbor
show ipv6 ospf interface
Ensure OSPFv3 is running.
Load Balancing Link to heading
Load balancing ensures efficient traffic distribution, redundancy, and optimised network performance. Here are advanced configurations for router load balancing using HSRP, BGP, and Dual WAN.
Configuring Load Balancing with HSRP (Hot Standby Router Protocol) Link to heading
Enable Multiple HSRP Instances for Load Balancing Link to heading
interface vlan 10
ip address 192.168.1.1 255.255.255.0
standby 1 ip 192.168.1.254
standby 1 priority 110
standby 1 preempt
exit

interface vlan 20
ip address 192.168.2.1 255.255.255.0
standby 2 ip 192.168.2.254
standby 2 priority 120
standby 2 preempt
exit
Verify HSRP Load Balancing Link to heading
show standby brief
Ensure both HSRP instances are active and distributing traffic efficiently.
For a detailed guide, check out this tutorial.
Configuring Load Balancing with BGP (Border Gateway Protocol) Link to heading
Enable BGP and Define AS Number Link to heading
router bgp 65001
bgp log-neighbor-changes
exit
Configure BGP Neighbor for Load Balancing Link to heading
router bgp 65001
neighbor 192.168.1.2 remote-as 65002
neighbor 192.168.2.2 remote-as 65003
maximum-paths 2
exit
Verify BGP Load Balancing Link to heading
show ip bgp summary
Ensure multiple paths are active for traffic distribution.
For more details, check out this Cisco guide.
Configuring Dual WAN Load Balancing Link to heading
Enable Dual WAN for Traffic Distribution Link to heading
interface GigabitEthernet0/0
ip address 192.168.1.1 255.255.255.0
exit

interface GigabitEthernet0/1
ip address 192.168.2.1 255.255.255.0
exit
Configure Load Balancing Mode Link to heading
ip route 0.0.0.0 0.0.0.0 GigabitEthernet0/0
ip route 0.0.0.0 0.0.0.0 GigabitEthernet0/1
Verify Dual WAN Load Balancing Link to heading
show ip route
Ensure traffic is evenly distributed between both WAN connections. For a detailed setup, check out this ASUS guide.
Saving Configuration and Final Checks Link to heading
Save Configuration to Startup-Config Link to heading
write memory
or
copy running-config startup-config
Verify Configuration Save Link to heading
show startup-config
Ensure settings persist after reboot.
Testing Connectivity Link to heading
ping 8.8.8.8
traceroute 8.8.8.8
Ensure internet access is working.